The goal of this project was to create a visual guide for taking photographs of injuries. It was the case that there was little standardization of these images, which made it hard to determine severity, size and location. We set out to write a protocol instructing how to photograph injuries in context with size and color guides in order to create standard images that can be meaningfully used as reference of injuries.
Some of the problems we faced:
- photos of injuries need to have context to mean something
- people may not know what pictures are needed
- it is difficult to perform a task with only a manual
- manuals get printed in black and white and copied over and over to proliferate
- it doesn’t take much for people to not read the manual
- we need to help people avoid context blindness
- we need to encourage people executing tasks in the manual to make decisions about how to best complete them
The design decision for a visual guide:
- diagrams can demonstrate the process and desired result
- diagrams focus on a single subject, and remove ambiguity
- we are designing for intelligent users
The users of this manual might include health care professionals, social workers and advocates. This meant that we needed a guide that did not rely on specific knowledge, and that could be easily interpreted without ambiguity to get the same results. That is why we decided to include examples of what the final image should look like along with a diagram describing how to take the photo.
In order to create the two sets of diagrams, I tried to take the desired photos myself. This helped me figure out what to display in the process diagram, because I had to struggle with questions of framing, distance from subject and angle. Thankfully I had a patient model for this process.
I chose to create line drawings for this guide. The few existing guides had grayscale example photographs, which deteriorated quickly through repeated photocopying. I needed to create a guide that could be easily copied and shared, and a simplified, non-gender specific line drawing was the easiest way to satisfy those requirements.
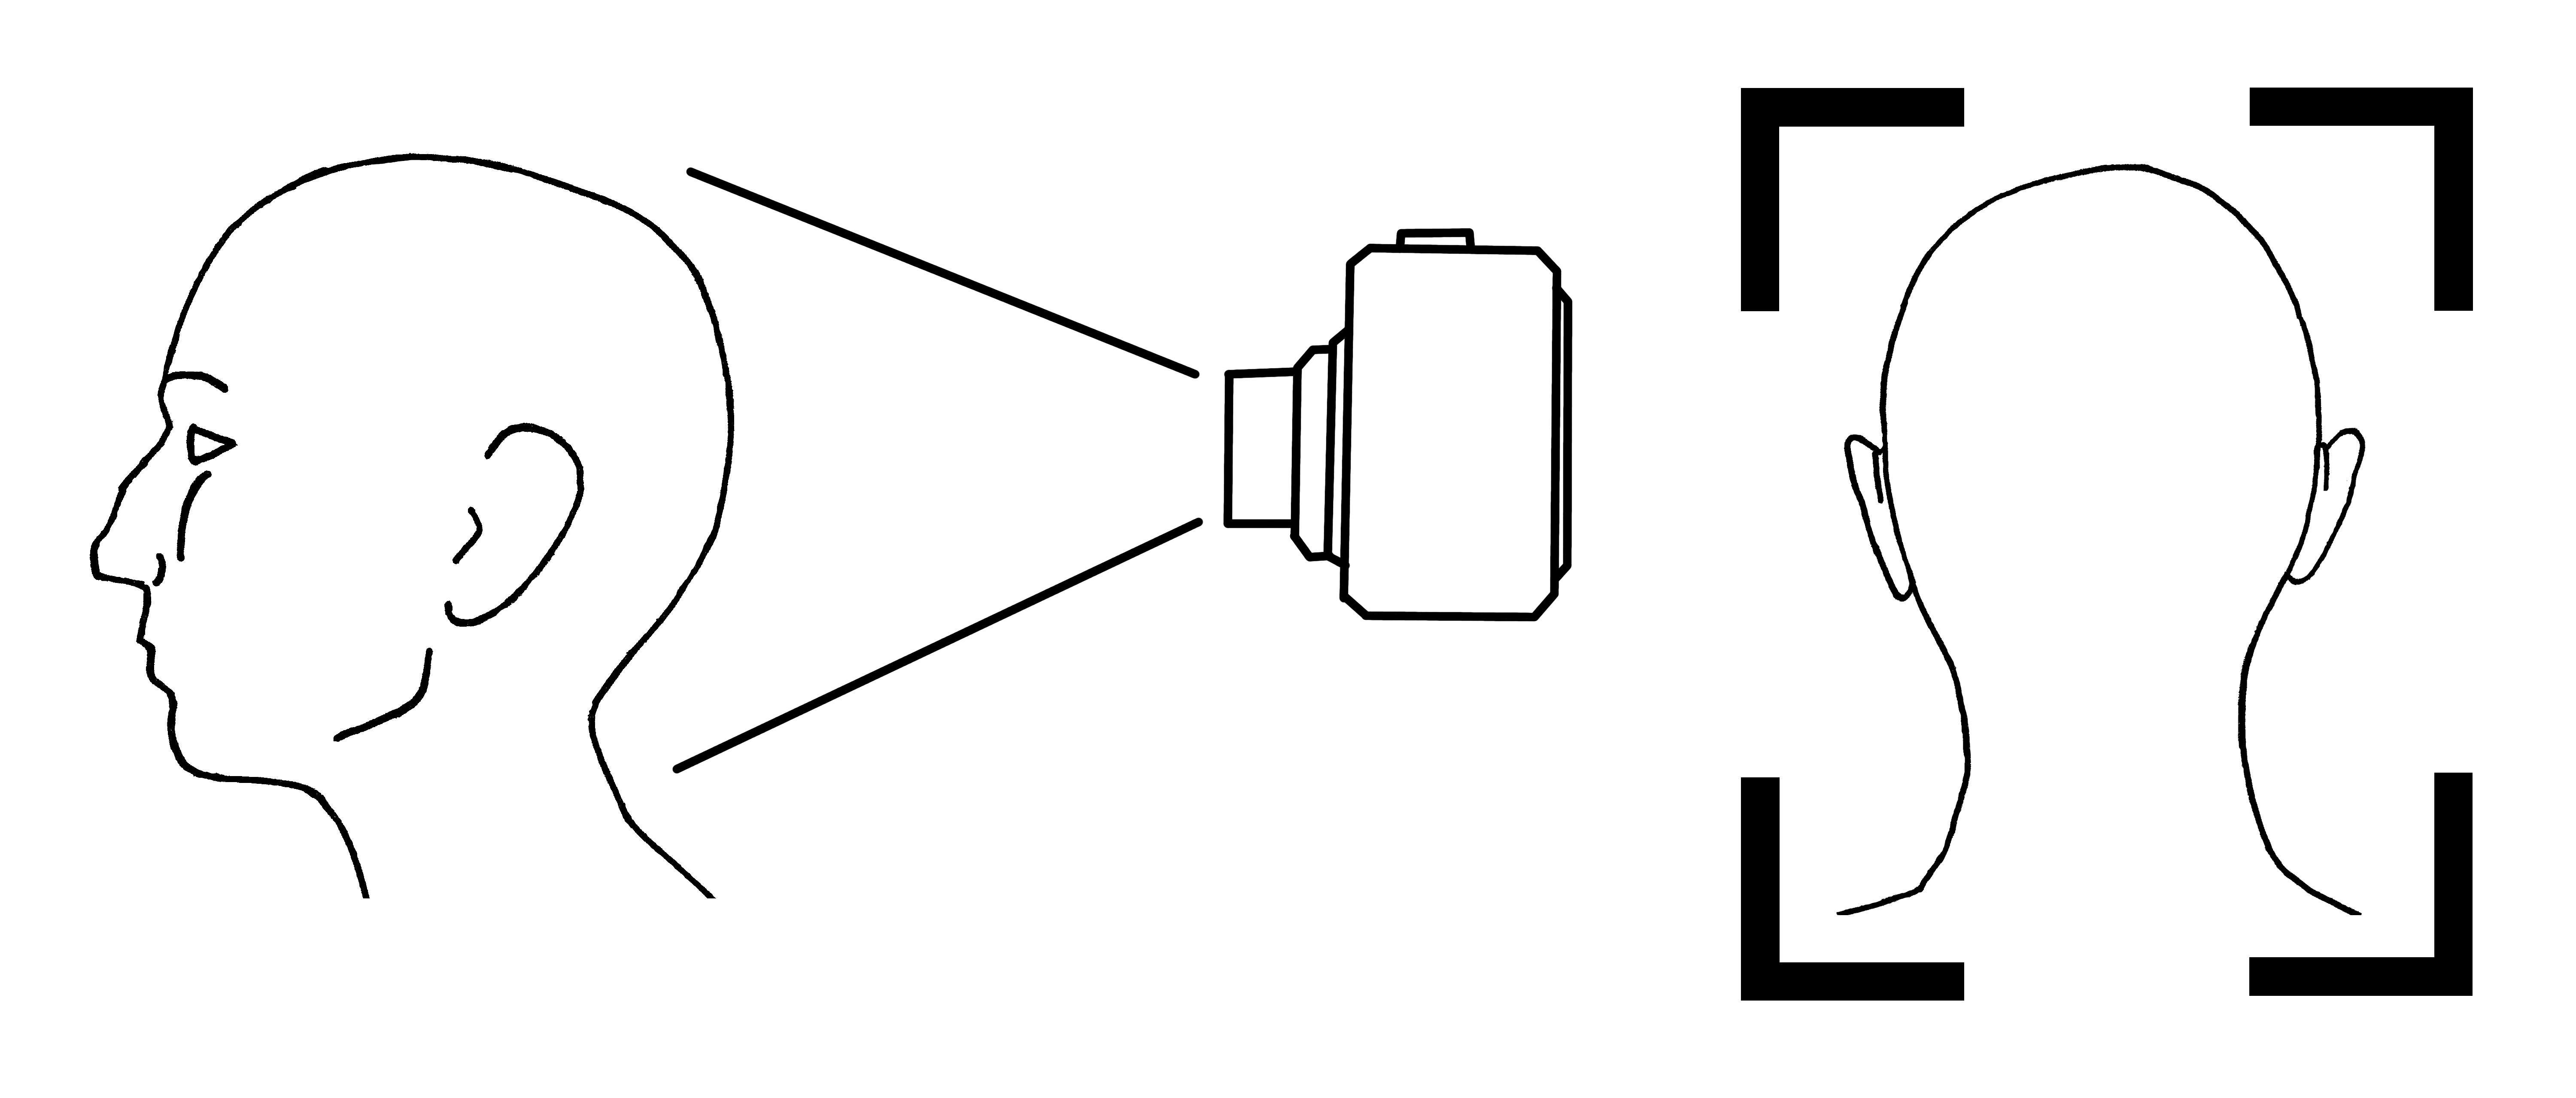
I also decided to omit specific directions for distance and angle, and instead let the photographer make their own decisions to create the desired image in the diagram. The camera I used in the diagrams is purposely over-sized to prevent unwanted interpretations of distance, and the lines are there to help the photographer figure out what should be in the photograph regardless of distance.
After completing the majority of the simple diagrams and examples, I ran them by the team and got feedback, particularly on other images to include, adjustments to the poses, and diagrams that needed to be modified. I created all the auxiliary images the guide needed: icons for flash, the SD card, etc, so that we would have free use of the images. The team later tested the protocol with a group of Research Assistants for comprehension.
Some examples from the finished guide:
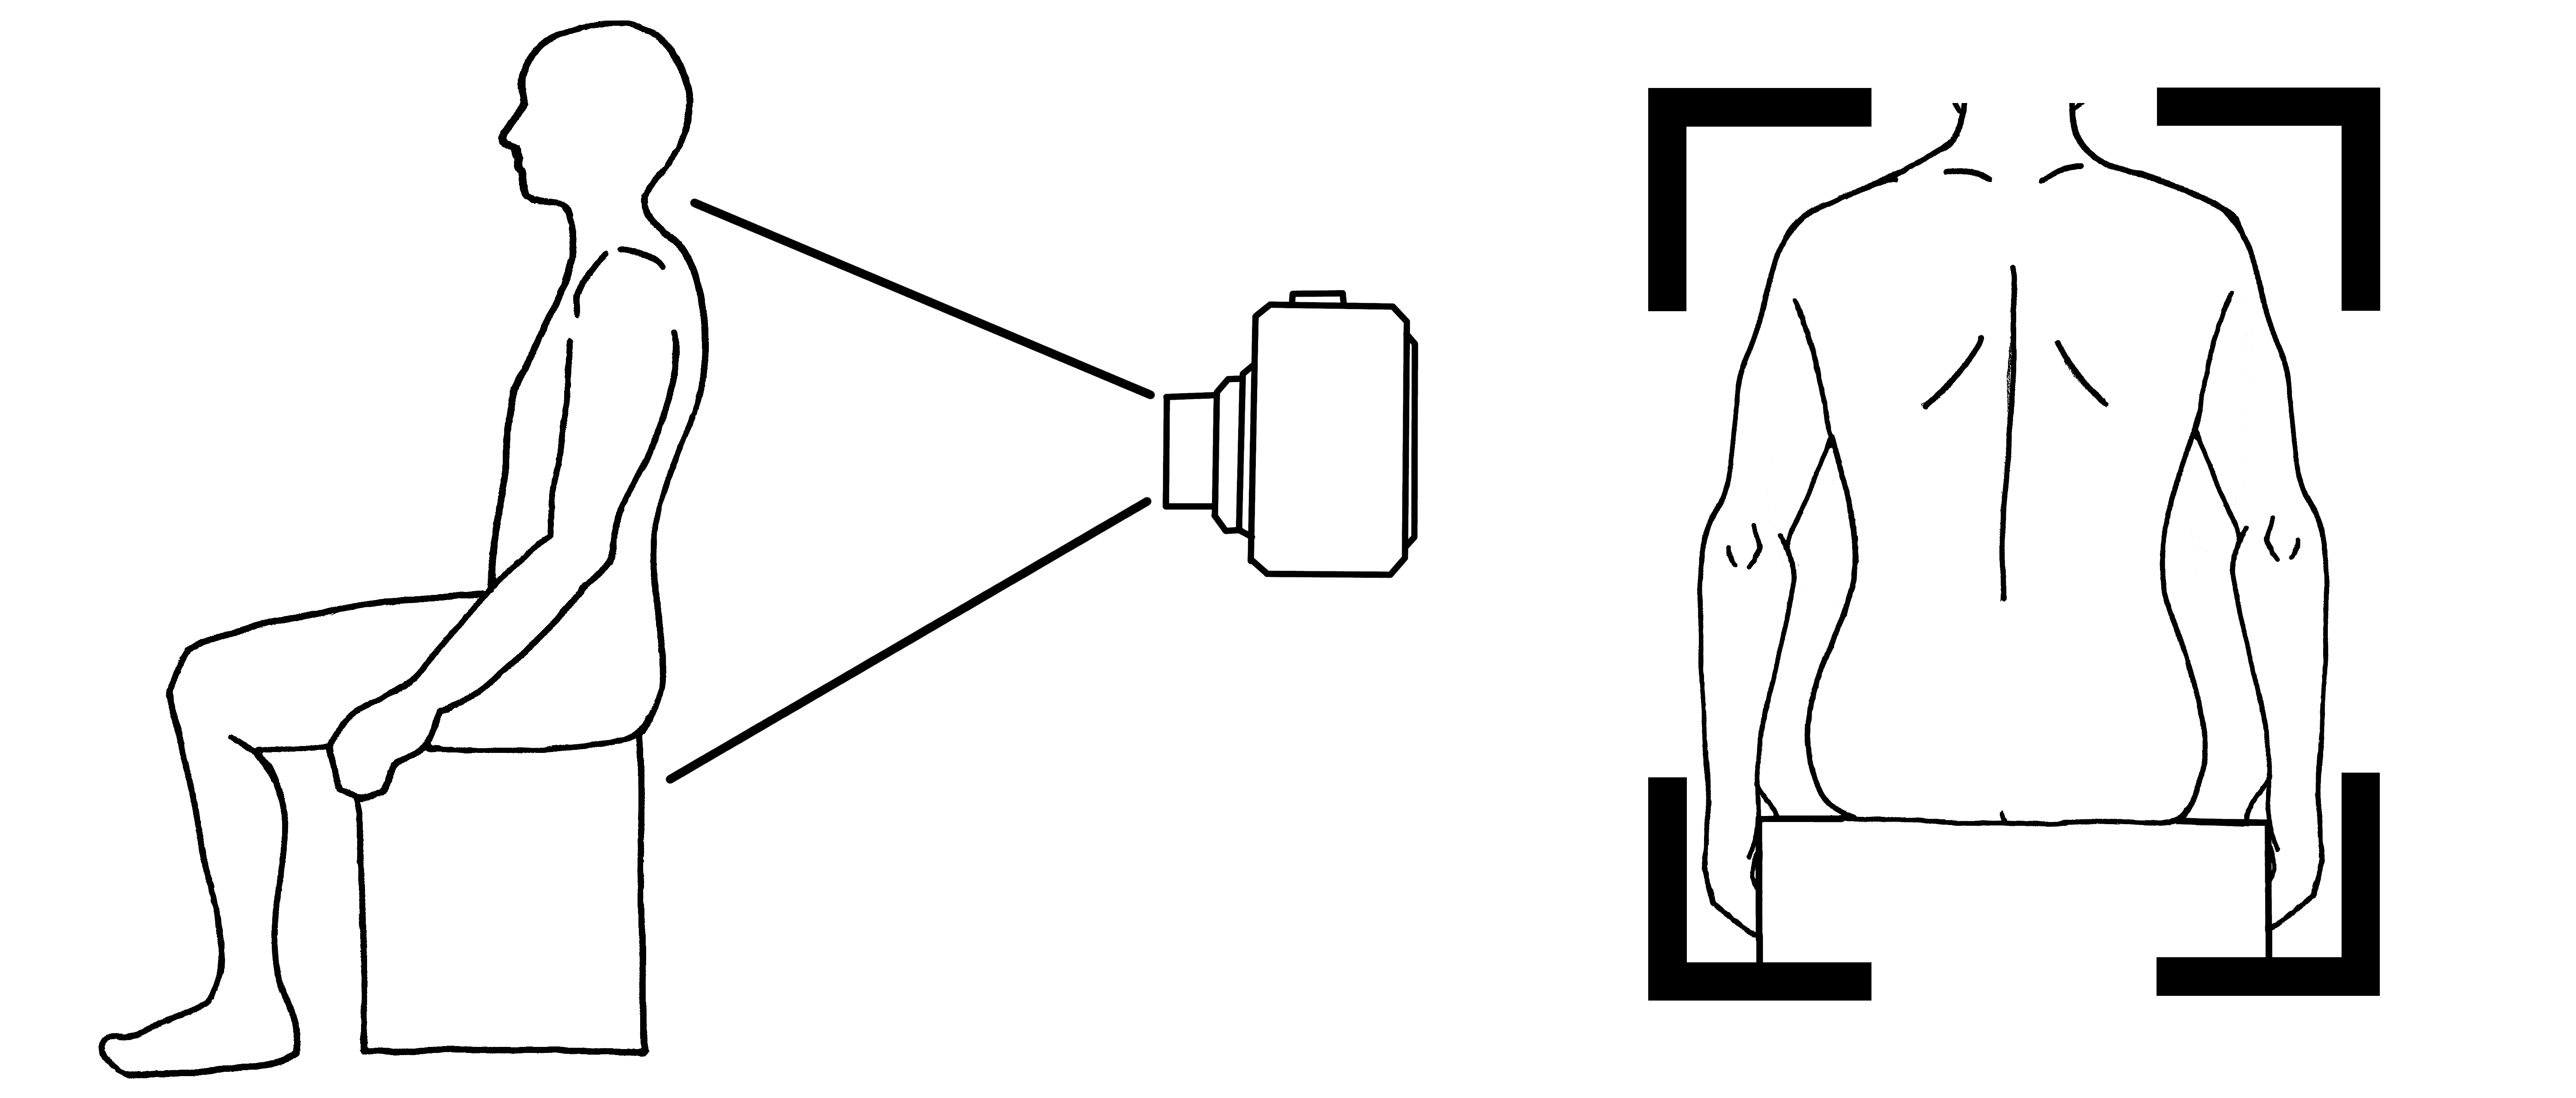
Diagram for photographing the full back
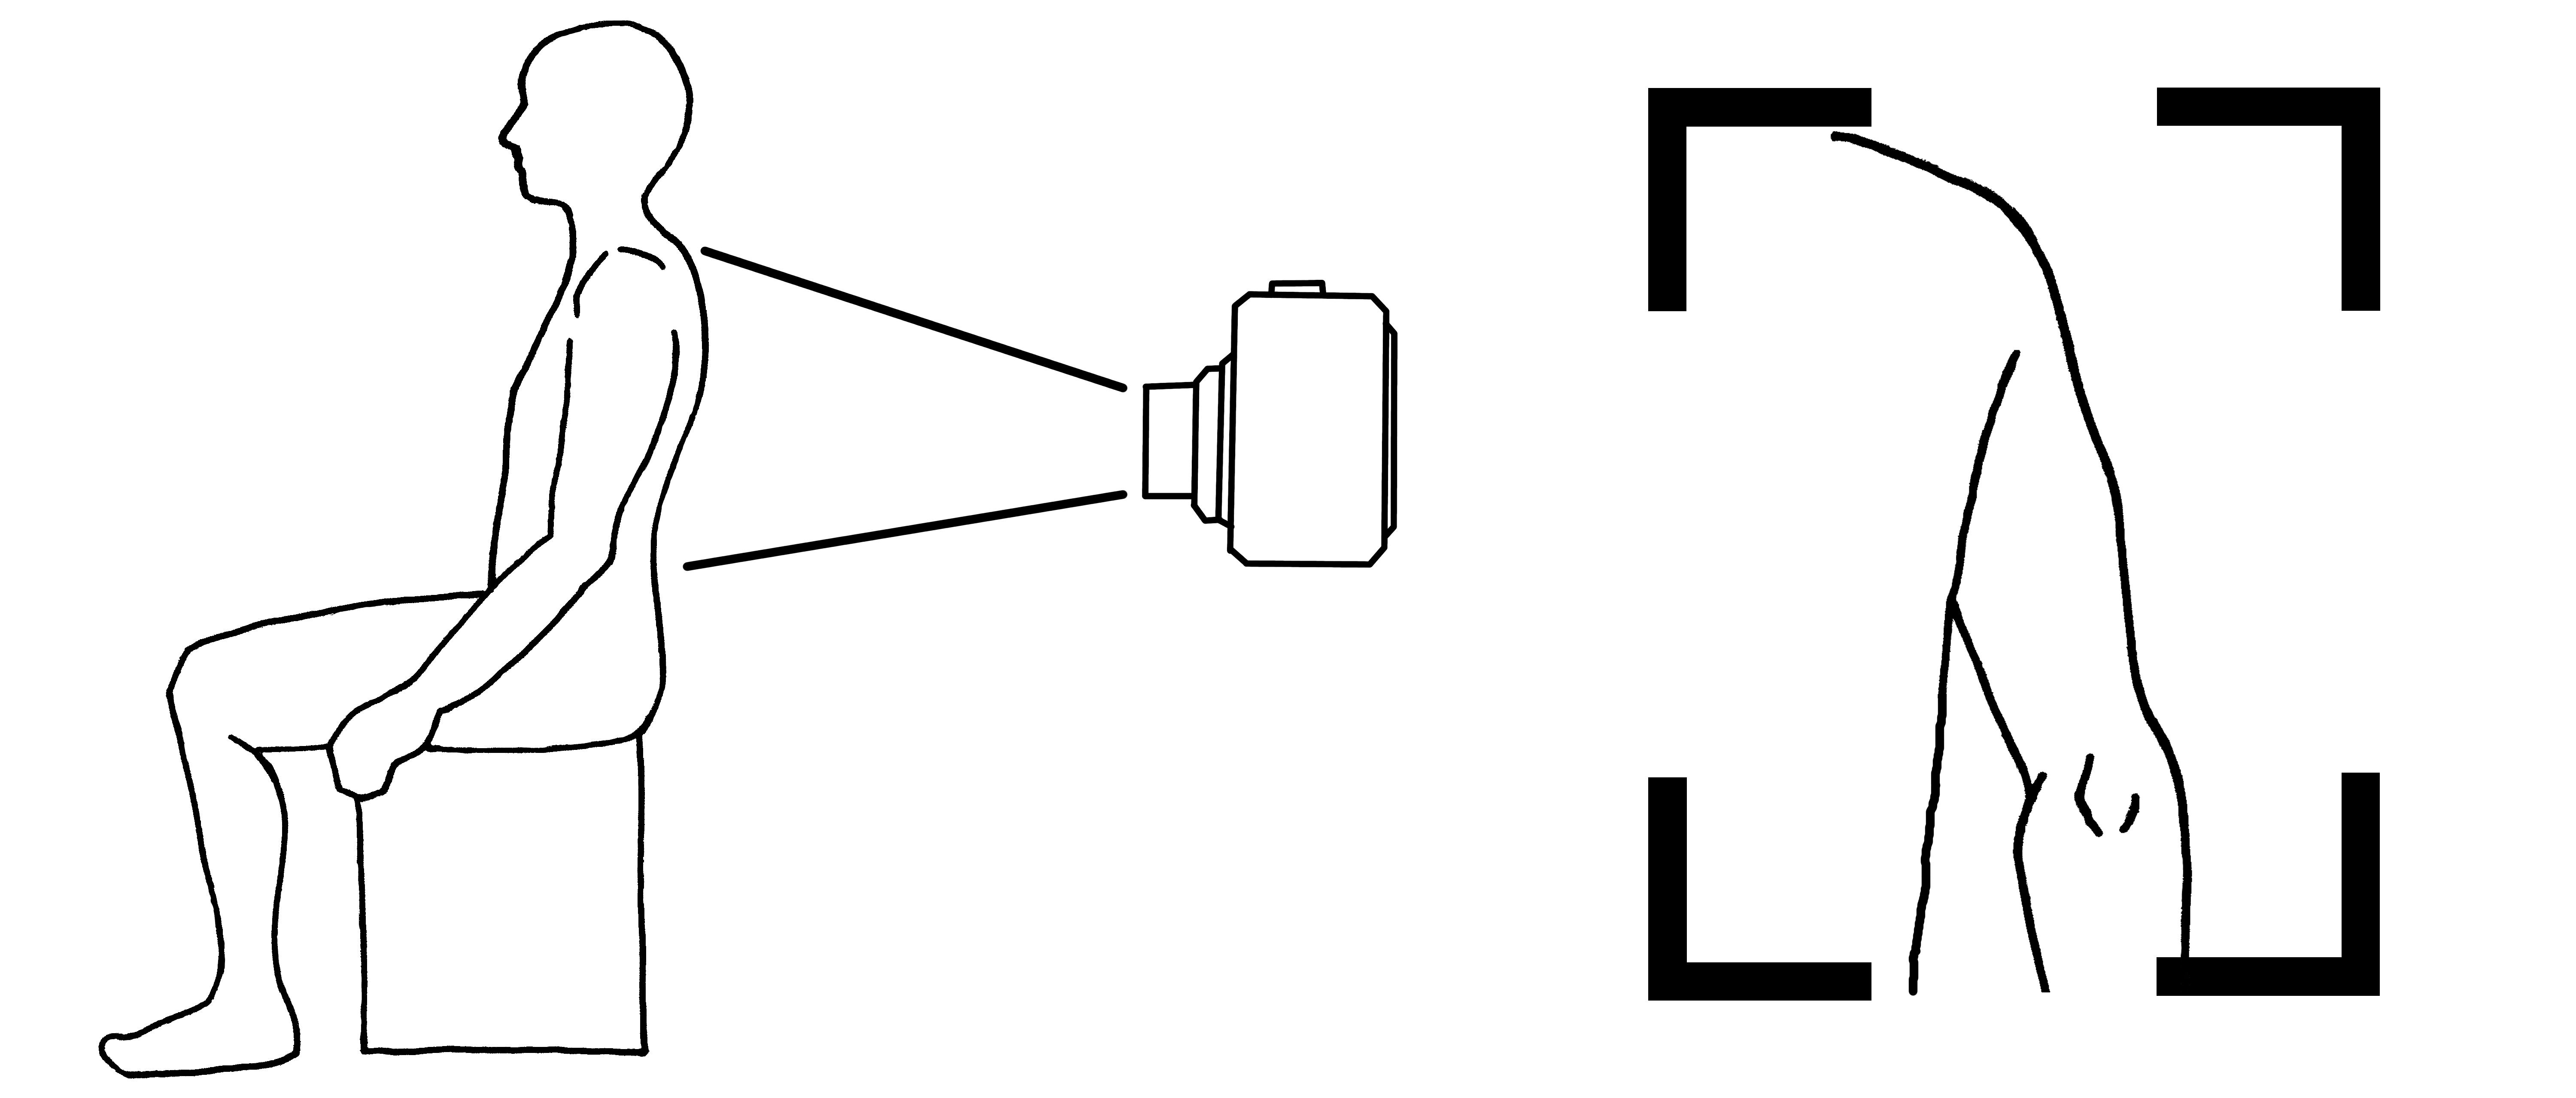
Diagram for photographing the back of the upper arm
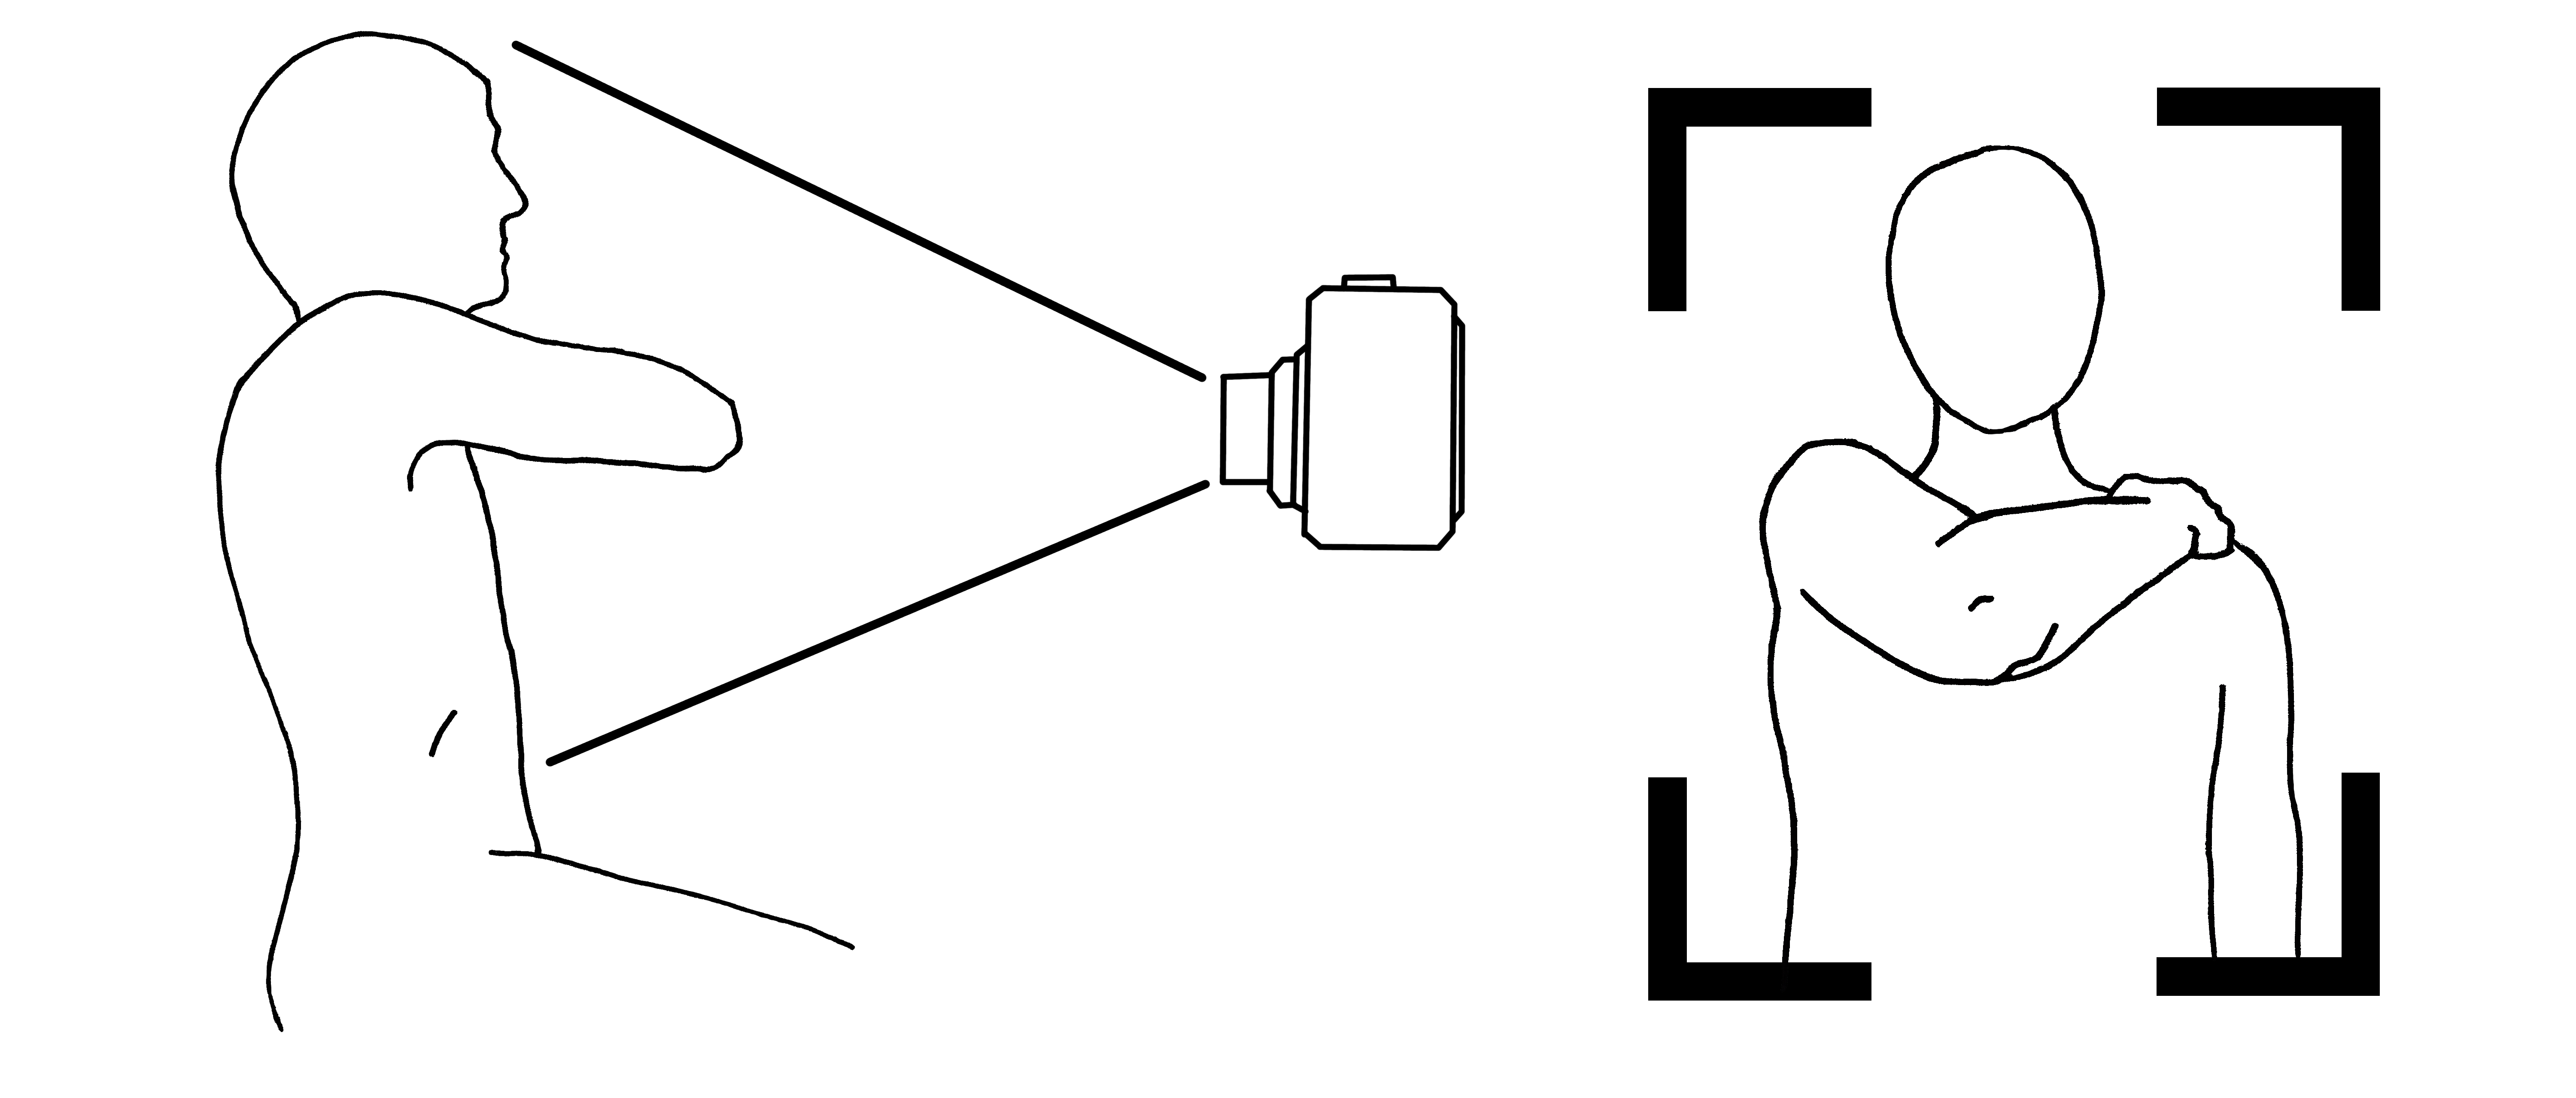
Diagram for photographing the elbow
The final product of this project is a published paper in Academic Emergency Medicine, available here.